
It is important to properly implement certain specifications for the correct exposure of your template in the screen printing frame. Here are some of the factors for producing a good screen printing template:
Preparation for Cleaning the Screen Printing Frame
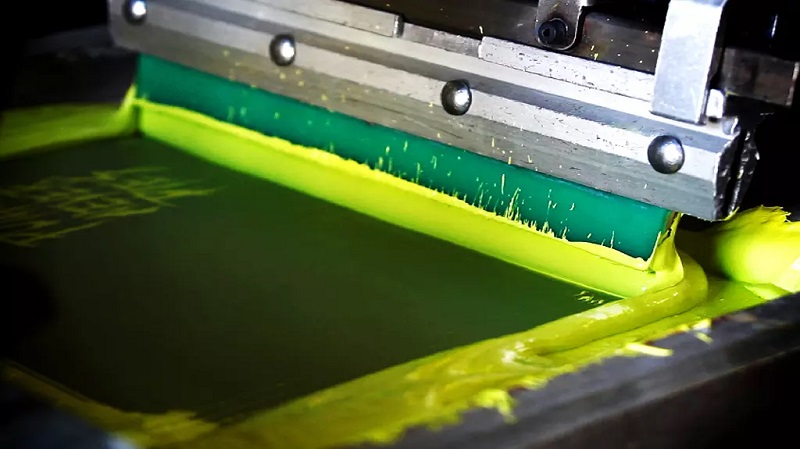
Before the first coating of the screen, the window must be thoroughly cleaned with a degreaser. The degreaser dissolves all dirt particles and fingerprints that have arisen throughout the entire processing process from shipping to unpacking. The degreaser also improves the adhesion of the photo-emulsion. The degreaser is applied directly from the bottle to the strainer and the strainer is cleaned with a damp sponge or cloth. The best is a microfiber cloth or squeegee, which does not leave any fibers on the screen mesh. This is because residual fibers get stuck in the subsequent coating and in the worst case this can lead to an unusable stencil. The degreaser should then be thoroughly washed out of the strainer with water. The wastewater can be discharged into public wastewater without hesitation. The window must then be completely dry before the window can be coated with photo-emulsion.
Determine the Correct Exposure Time
Correct exposure is especially important for two component emulsions such as mega definition photo emulsion. Often there are problems with the shelf life of the stencil, during stencil wash out or during printing, due to incorrect or insufficient exposure of the screen. Poor screen adhesion and small holes cause so many problems during screen printing. Errors that could have been easily avoided cause delays during printing. Small holes should be sealed with screen filler. In the worst case, the sieve must be re-coated and exposed. We can assure you that you would rather not do this.
Therefore: Know the correct exposure time for your setup! With exposure meter you get a tool that should not be missing in any screen printing. With the exposure meter you have the option to thoroughly test your emulsion before use. Know the correct exposure time for your emulsion, regardless of the product you will be using.
The Exposure Meter Provides The Correct Information! How Exactly Does It Work?
The exposure meter is easy to use. This is a professional printed film, divided into 5 columns. Each column has a resolution goal (circular shape), a set of halftone grids, and a few lines of text of different sizes. All columns are marked with a “Factor” number. Four of the five columns are covered with a gray filter with different opacity. These filters ensure that less or more light passes through the emulsion during the exposure.
Estimate the correct exposure time for your emulsion.
Adhere to our general guidelines for the particular emulsion. When using the 400 watt lighting lamp and the Easy Blue emulsion, an exposure time of 3:30 minutes applies, for the mega-definition emulsion 10 minutes. Now double this exposure time. With Easy Blue, that’s seven minutes of double exposure.
Now use the exposure meter as the template on the screen and expose the screen with the doubled exposure time, i.e. 7 minutes. Then wash the strainer as usual and let it dry. Attention, the Easy Blue emulsion is evaluated with the wet template. Once the template is dry, you won’t notice any color change!
